

Team Management
View, filter, add, and manage Newline Dashboard team members, roles, statuses, and client group access.
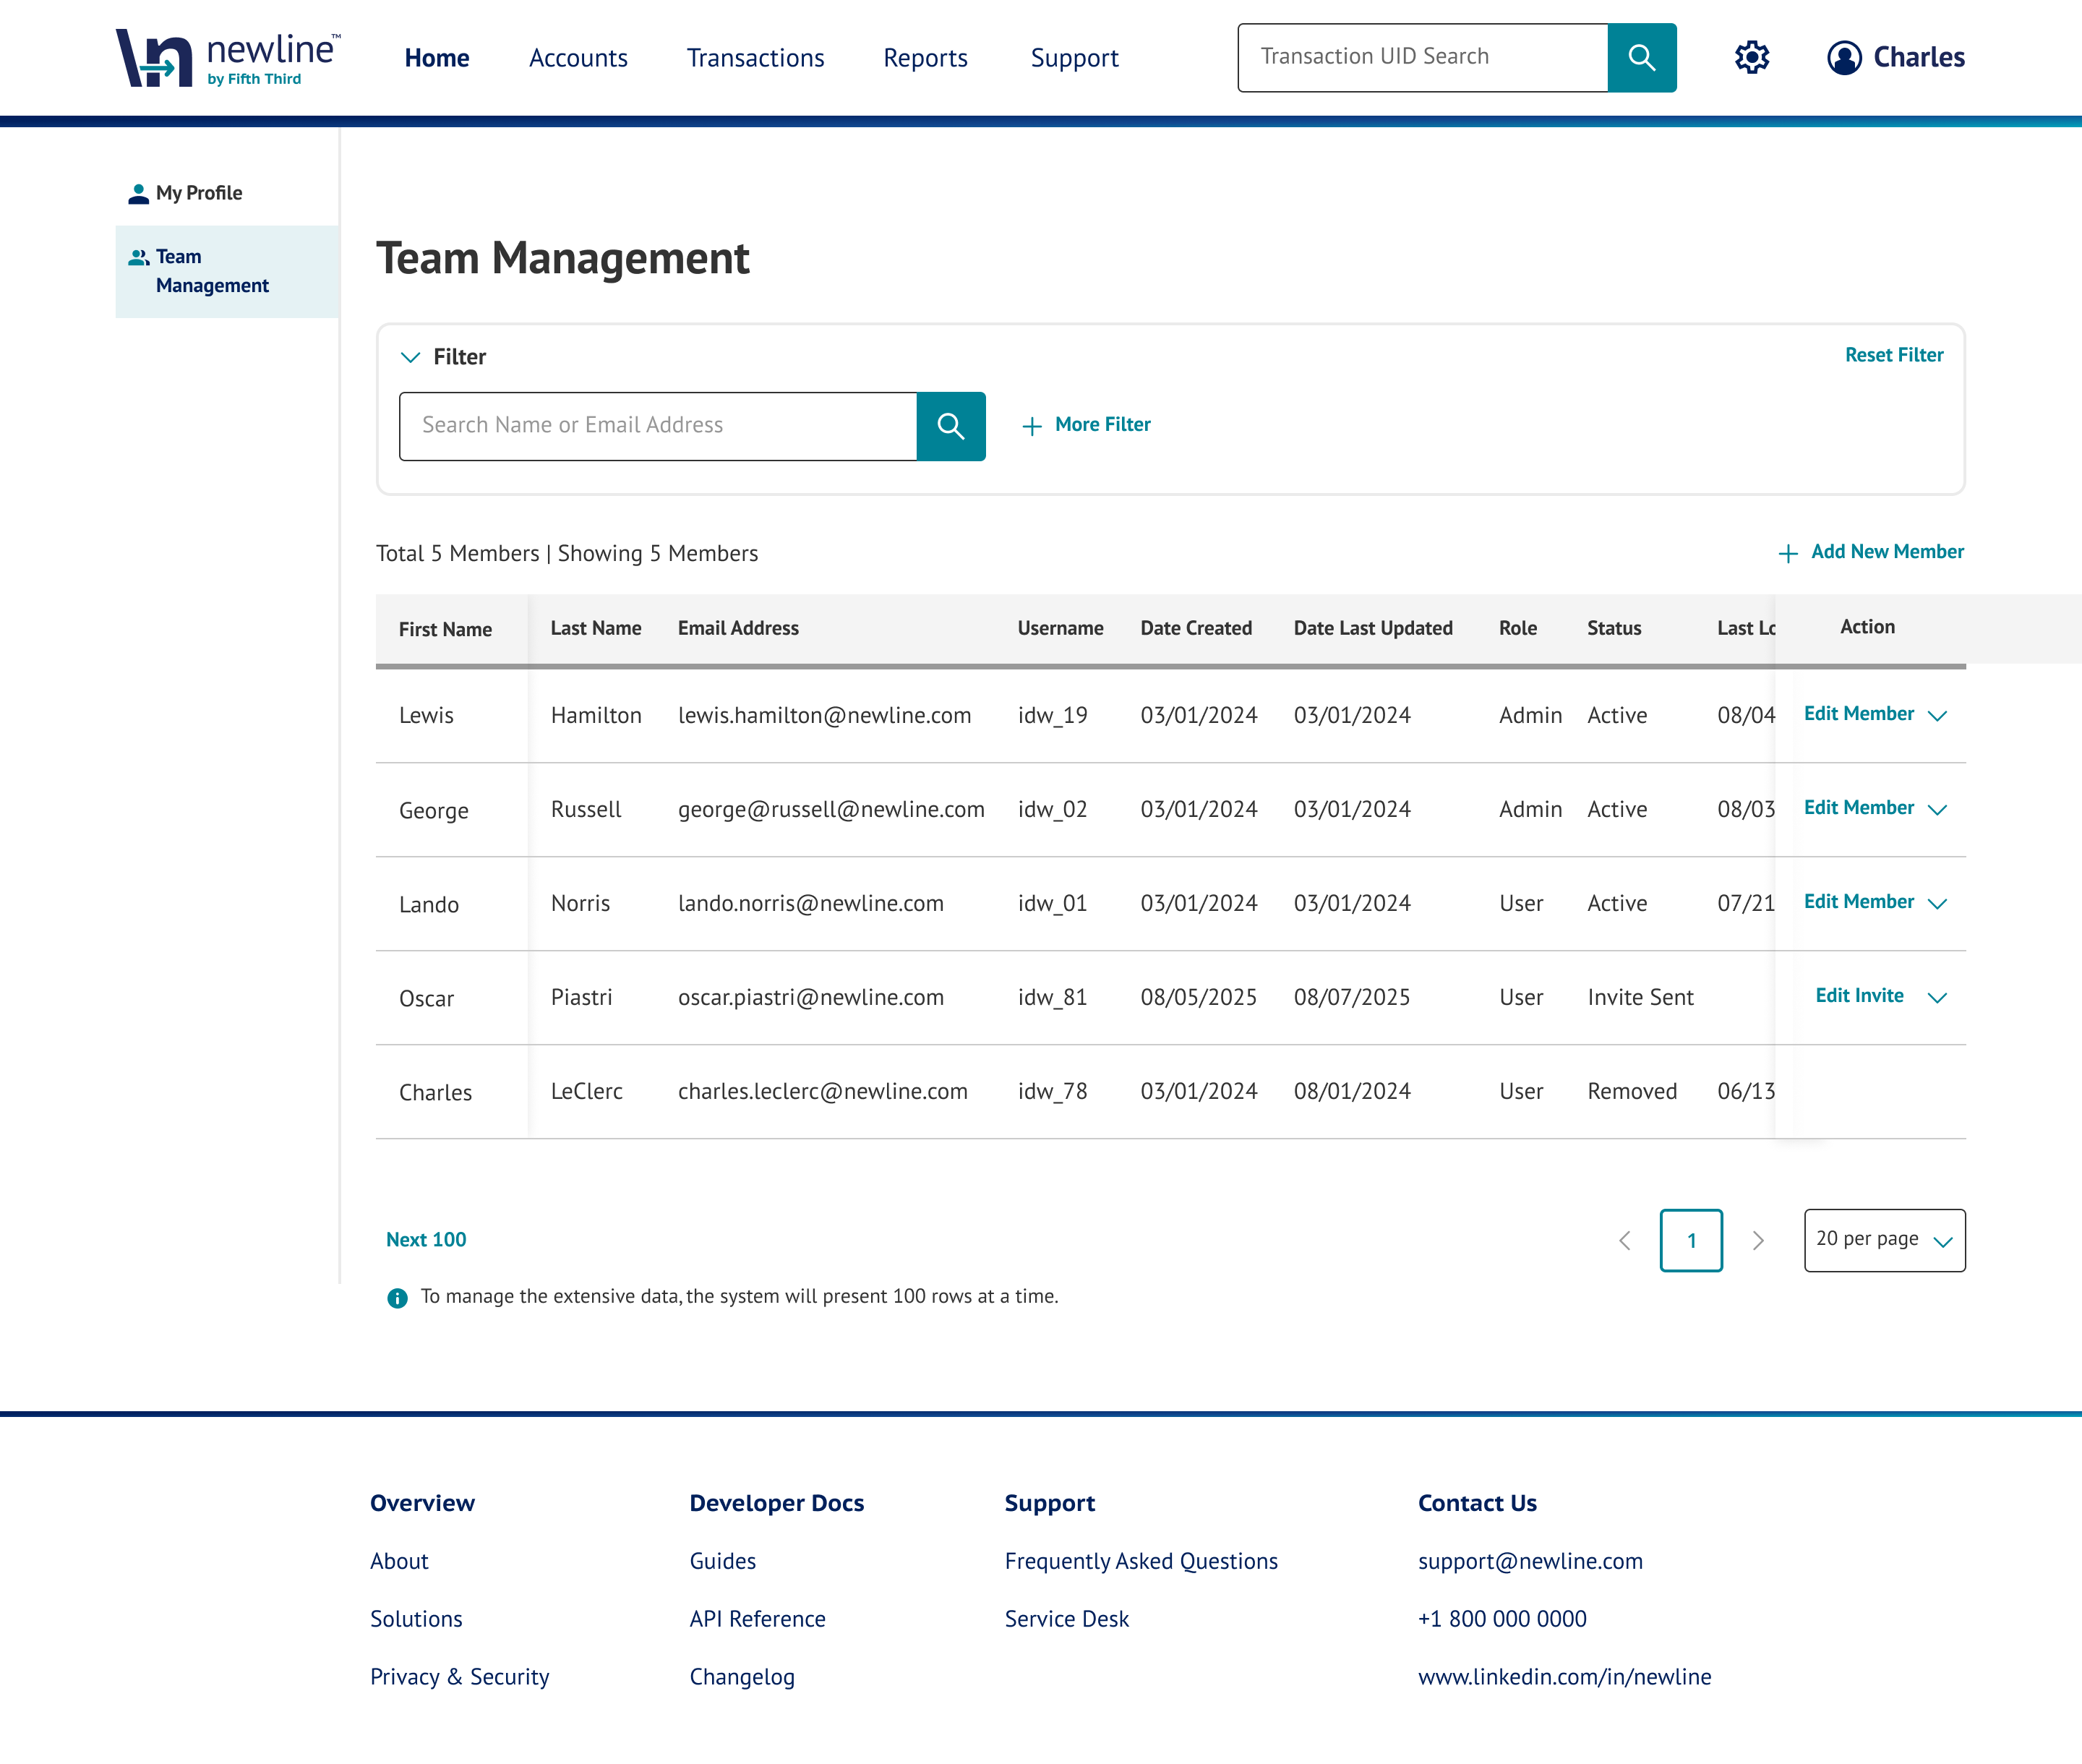
Use the Team Management page to view and manage users who have access to the Newline Dashboard. From this page, you can search for team members, review roles and statuses, and manage user access.
Accessing Team Management
To access Team Management:
- Click your profile icon in the upper-right corner
- Select Team Management
- The Team Management page will load with a list of users and available management tools
Managing Team Members
The main table displays all users with access to the dashboard, including:
- First Name
- Last Name
- Email Address
- Username
- Client Group
- Date Created
- Role
- Status (e.g., Active, Removed)
- Last Login
Use this view to review access, monitor activity, and verify user roles.
Search and Filters
At the top of the page, you can locate users using:
- User search bar (search by name or email)
- More Filters for additional filtering options
Select Clear Filters to reset search criteria.
Additional Filters
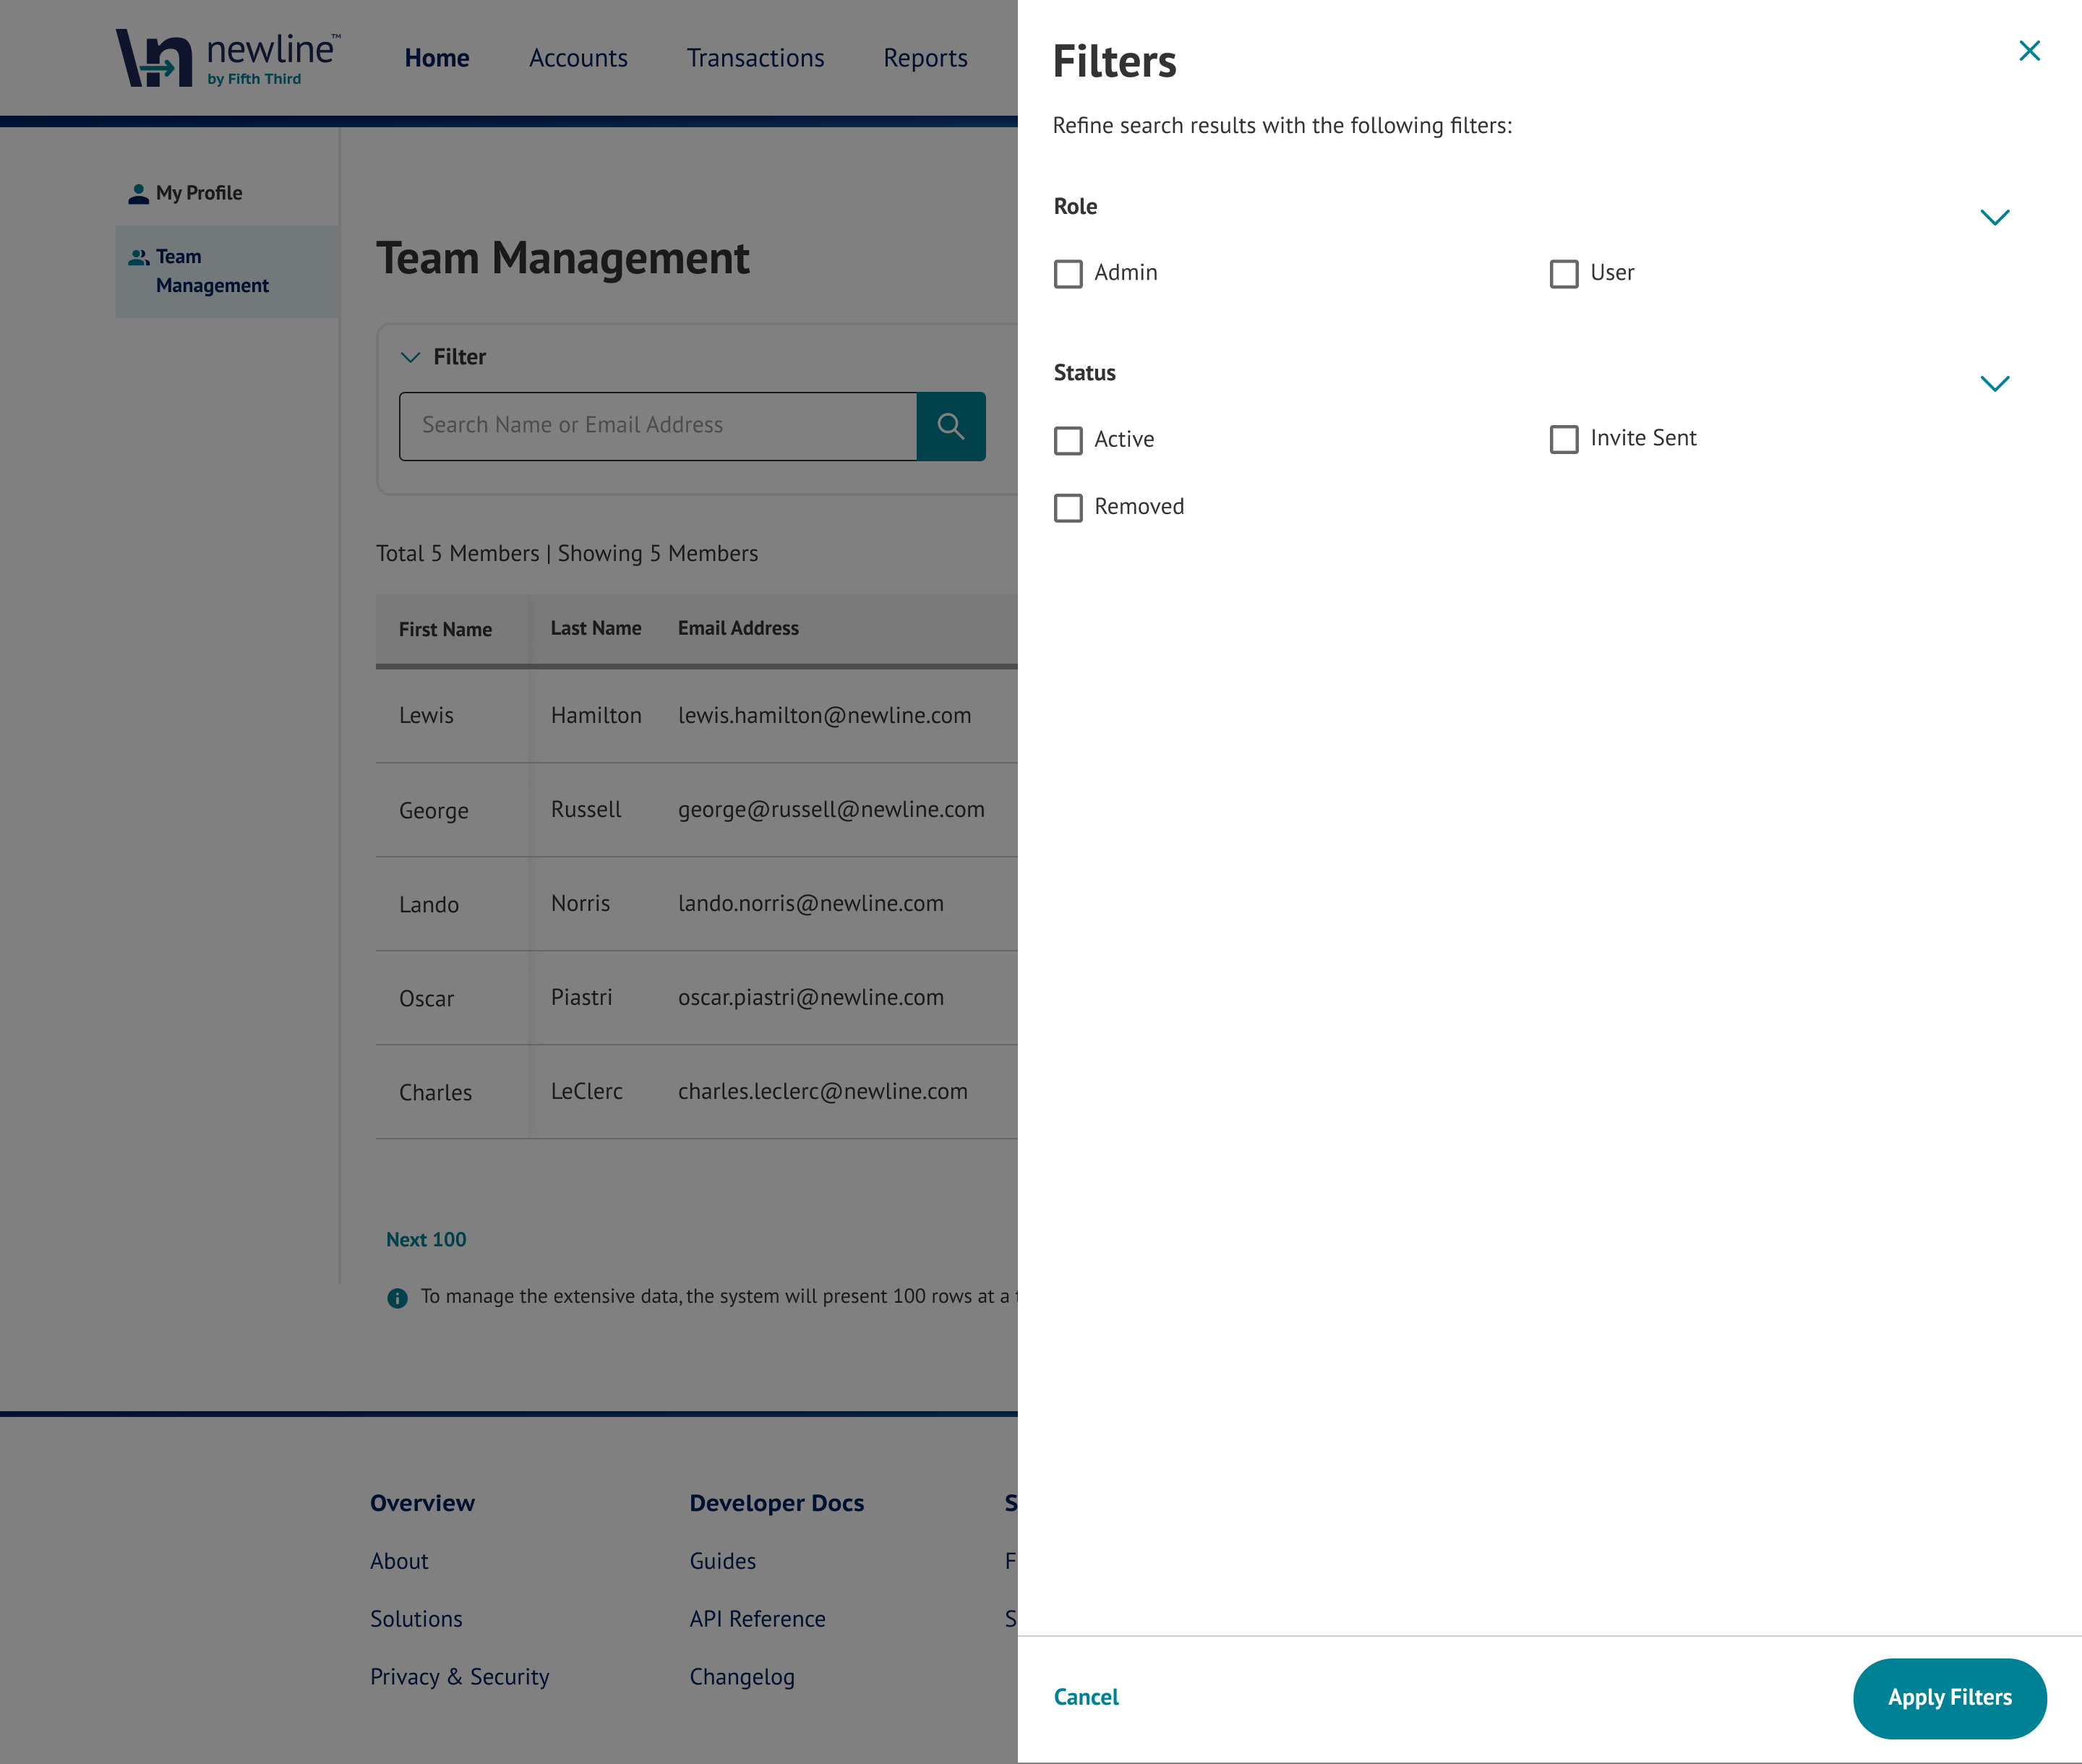
Selecting + More Filters opens a filter panel that allows you to further refine the Team Management user list.
The filter panel includes the following categories:
- Role – Filter users by assigned role (e.g., Admin or User)
- Status – Filter users by account status (e.g., Active or Removed)
- Clients – Filter users by associated client group
Use these filters to narrow down results when managing large teams or locating specific users.
Editing and Managing Users
Each user row includes an Edit Member option, allowing admins to:
- Update user details
- Modify roles or access
- Review account status
Adding a New Member
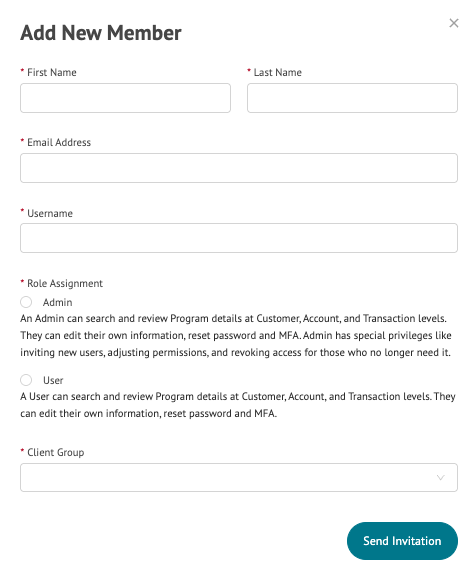
Admins can add new users by selecting Add New Member from the Team Management page. This opens a form where user details and access permissions are defined.
Required Fields
Complete the following fields to create a new user:
- First Name
- Last Name
- Email Address
- Username
- Role Assignment
- Client Group
Role Assignment
Select Admin or User based on the access level the team member needs. See User Roles for the capabilities assigned to each role.
Client Group
Assign the user to a Client Group, which determines the scope of data and programs the user can access within the dashboard.
Sending an Invitation
After completing all required fields:
- Click Send Invitation
- The user will receive an email invitation
- The user must complete account setup and authentication via Okta before accessing the dashboard
User Roles
| Role | Capabilities |
|---|---|
| Admin |
|
| User |
|
Pagination
- The table displays users in pages (e.g., 10 per page)
- Use pagination controls to navigate through the full user list
- A maximum of 100 rows may be loaded at a time
Notes
- Only Admin users can manage team members
- User status reflects current access (e.g., Active or Removed)
- Access changes apply at the program or client group level
Updated 29 days ago